Hello and welcome to Sanctuary Lite! This is my first ever blog post, so if you’re reading this… THANK YOU!! I’m so excited to get started on this blog, and appreciate any and all support! So seriously, thank you for being here, it means the world to me!
For my first project for the blog, I knew I wanted to do some kind of “makeover” in the trailer. And I have been wanting to do something with the kitchen for awhile now (along with all the other projects I have planned), and also wanted an easy-ish project that would make a big impact. This is the first post, after all!
The walls inside of the entire trailer are currently a deep rusty orange color. I found this can of paint at a second-hand home improvement store during the first remodel, and I actually really liked it. It does make the inside feel a bit darker and smaller, but I actually kind of enjoy the coziness of it. 😊 I am planning on repainting in the future for a fresher/brighter feel, but that’s going to be a big project in this little space and is going to require a good amount of planning.
That being said– having all the walls looking exactly the same really exaggerates the fact that this trailer really is just one small room. My bed is directly next to the kitchen sink, my bedroom is also the kitchen, and also the living area… and also the closet lol (hey at least it’s a walk-in closet… kinda).
I felt like having some differentiation between the kitchen and bedroom would aid in the illusion that there are different sections of the trailer. Or at least look cute and bring me joy, which it absolutely has!
So, originally I had wanted to use a peel-and-stick tile from Dollar Tree. I thought this tile I had seen on the website would go well with the orange walls, but I also knew that there was no way to know if I would actually find it– just because the Dollar Tree website says they have something, does not mean they have it. But I went to the nicest DT in my area in hopes of finding a good selection of… something.
And as luck would have it, they had the tile I wanted! But, as is to be anticipated at Dollar Tree, they did not have enough in stock for my project. I was slightly disappointed, but it’s not their fault. They’re fighting for their lives out here.
However, I was able to find a really pretty peony print wallpaper! They had 19 pieces, and I got every piece. It seemed like it might be too much at the time, but I did not want to risk not having enough, and never being able to find it at Dollar Tree ever again. Even the cashier said it was a good move to grab it all. And the woman in line behind me told me I was being brave doing my own wallpaper– she said she’d tried doing it once and swore never to try it again. So it was a good pep talk, for sure.
And with that, I left Dollar Tree very excited (and also slightly nervous) to get started on this project!
So, this is what my kitchen looked like before:
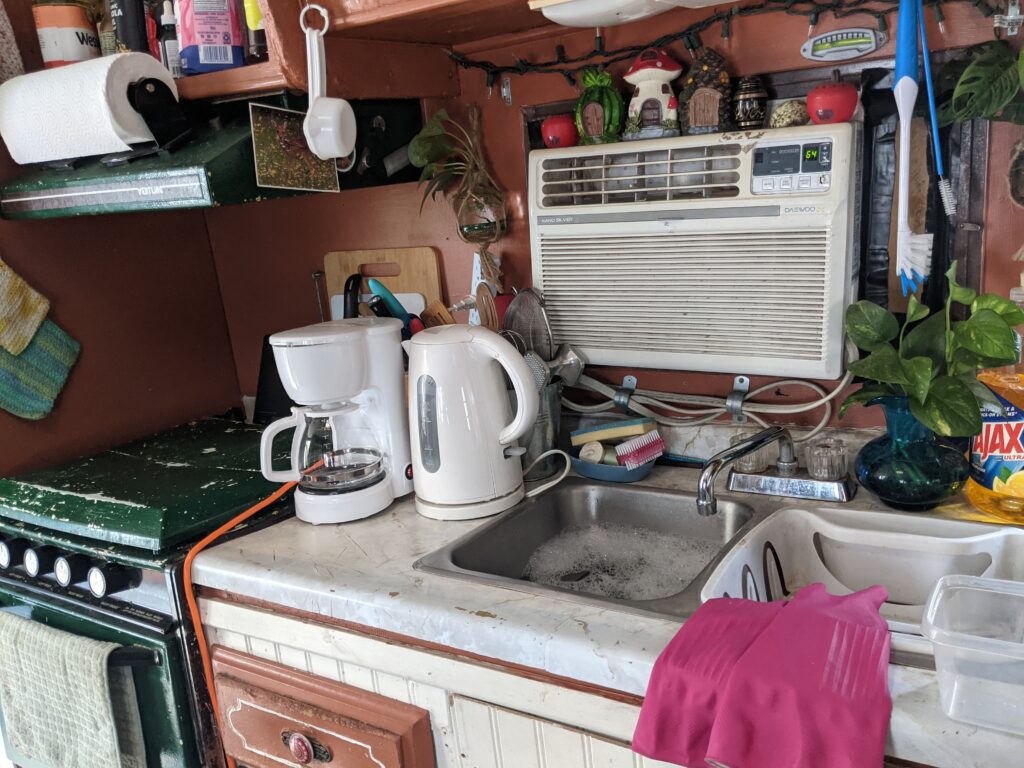
I had to take everything off the walls and clean them to give the DT wallpaper the best chance at sticking. I used a degreaser and a microfibre cloth to get all the food spatter, dust, and cobwebs off the walls and corners, and made sure they were fully dry before getting started.
I also decided to pop out the water pump switch since I have never used it, and it was taking up space on the wall just looking ugly (sorry switch). I don’t ever plan on needing to use my water tank since I’m always hooked up to city water. I’m actually hoping to remove the water tank all together so I can use the under-the-bed area for storage (stay tuned!).
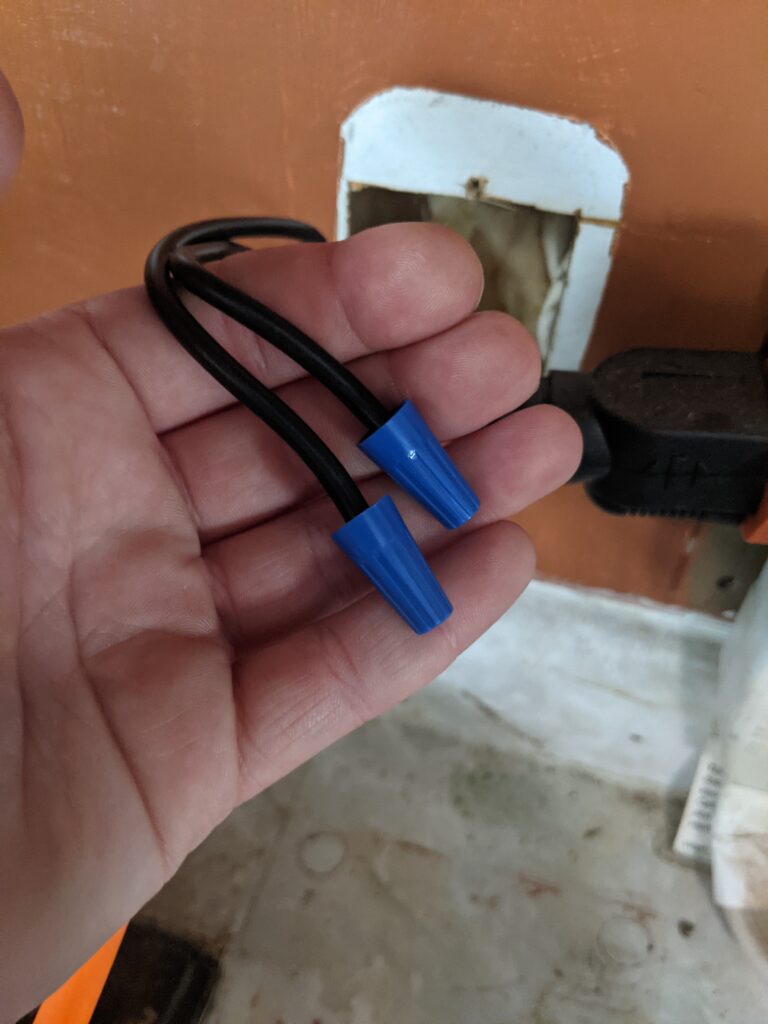
I just removed the screws on the switch and popped it off with a scraping tool. The screws seemed to be doing all the heavy lifting, because as soon as I touched the scraping tool to the cover it just fell off. I snipped the wires for the switch and covered them with fuse covers. I then just put the wires behind the wall and put some masking tape over the opening in the wall to give the wallpaper something to sit on top of.
There is definitely a more structurally sound way to do this, involving drywall tape and joint compound, but this works well enough for my needs. I keep utensils in front of this area of the wall, and nothing is ever touching that part of the wall that could puncture it. If I ever decide to re-do the wallpaper (which maybe will happen someday since I have bigger kitchen plans), maybe I’ll patch it properly. But for now, this will definitely work.
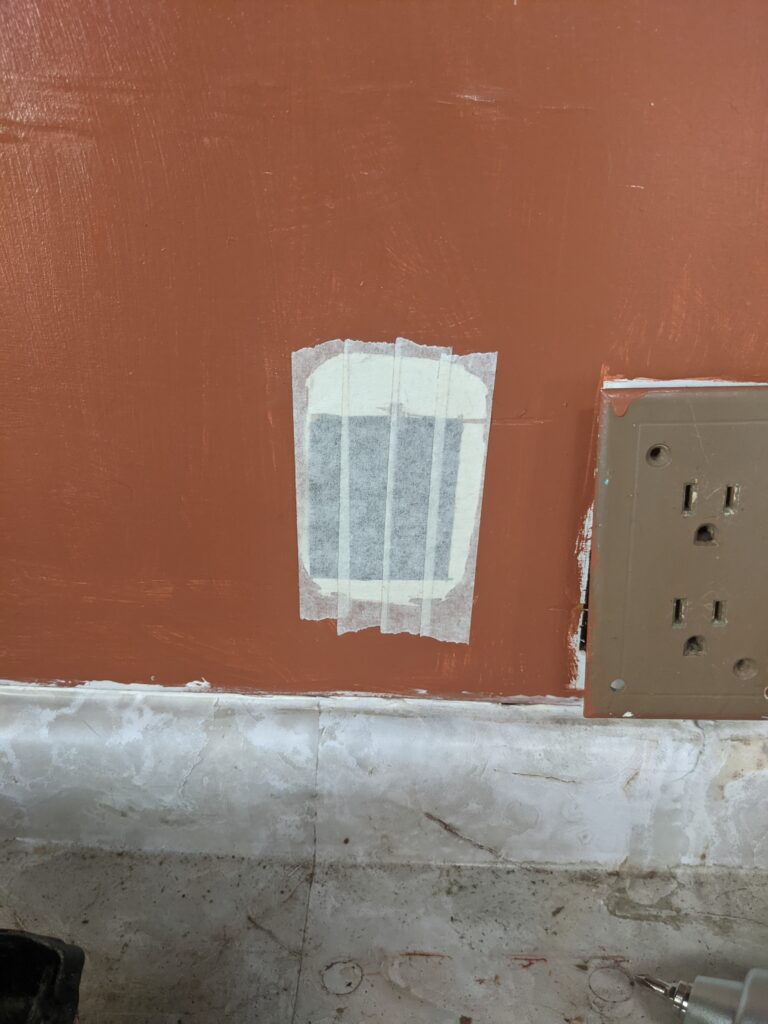
So with the walls prepped, I was ready to start papering!
I started here in this bottom corner area of the wall. This would be the only place where I could use one entire piece of wallpaper, and all the other pieces would be matching the pattern created by this piece.
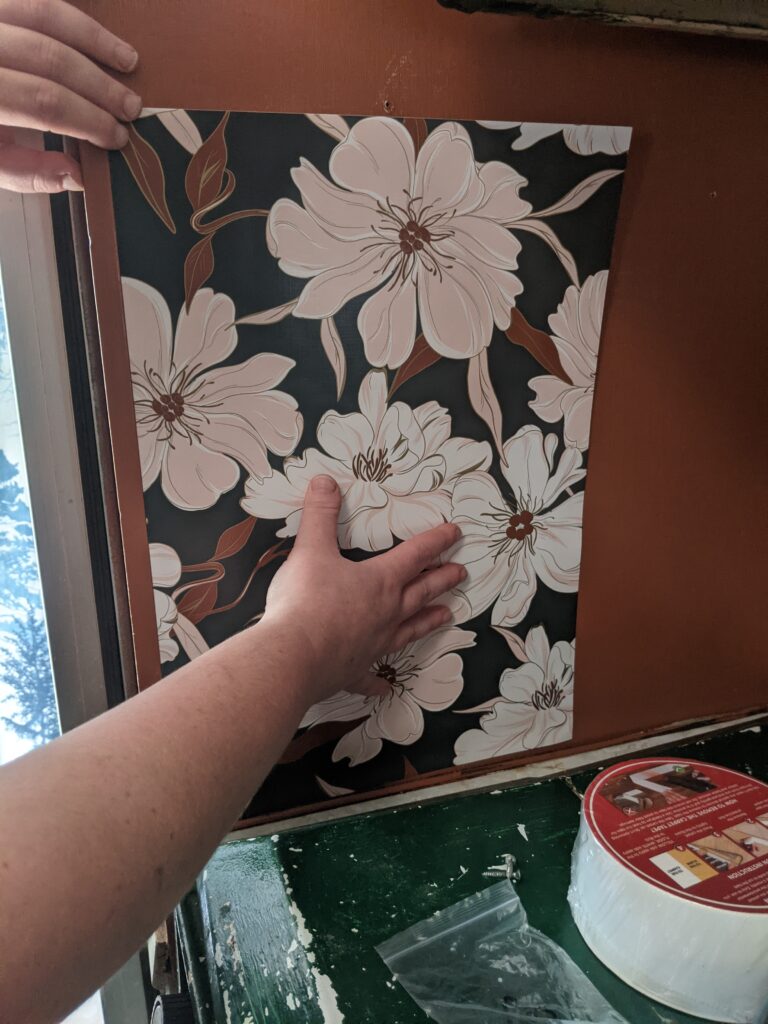
To use this kind of wallpaper, you pull off the left side first, and get the paper stuck where you want it to be. This paper from DT had a separate piece of backing to pull off before committing to removing the backing from the entire piece, which was very helpful during the entire process. The paper was also relatively thick, which gave me a little extra confidence in my incredibly rough patch job.
Once I got the first section of backing removed and the paper stuck where I wanted it, I smoothed it out with a credit card to avoid bubbles (I actually used the remote for my tower fan, but you get the idea… and I’m going to keep saying credit card because that’s what I would recommend. I was just too lazy to go get my purse out of the car).
Then, you pull the backing off with one hand as you simultaneously smooth the front side with the credit card as you go.
From there, I decided to move up the wall along my upper kitchen cabinet. The whole piece of paper wouldn’t be used from here on out. I had to create pieces of what my sister coined “Franken-Paper” for the rest of the kitchen because I needed very specific areas of the pattern cut into very awkward shapes.
I did my best to crease the paper in the exact area I needed it to be cut before cutting it with a box knife. You can use the credit card to get more precise creases. Take your time with this step! I kind of rushed it and there is definitely some jagged edge along some of my pieces. Just don’t look too close at my wallpaper.
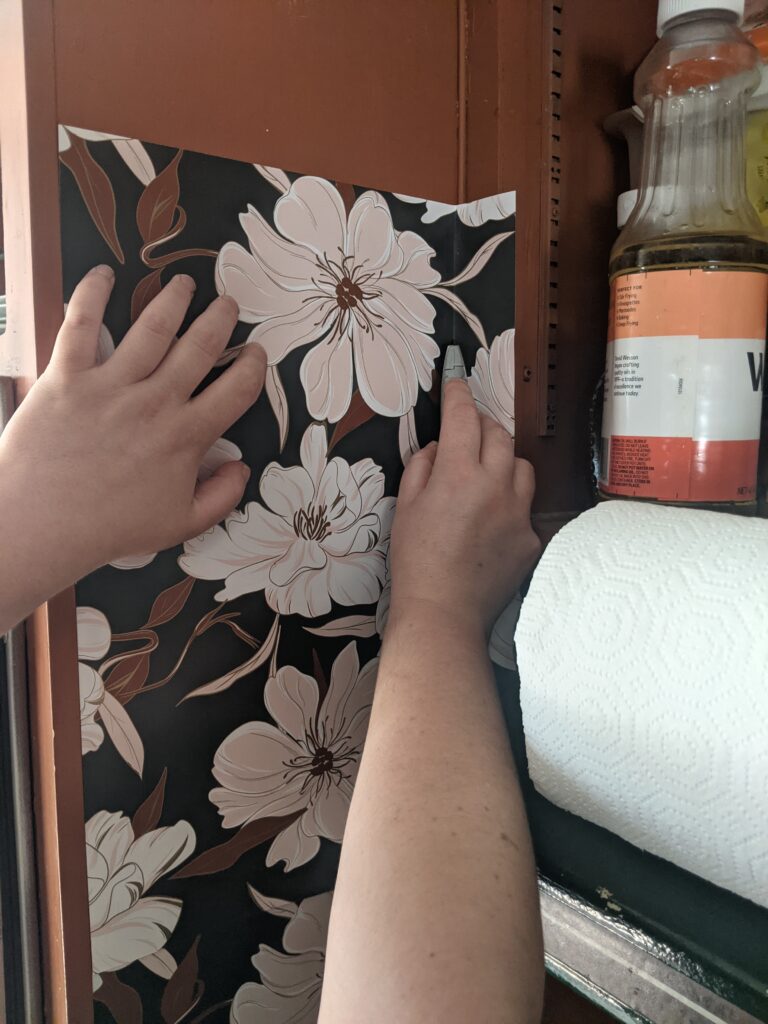
This is pretty much the technique to use for the entire rest of the kitchen. There was a lot of measuring, creasing, cutting, and frustrated yelling. This process can get a little stressful at times because of the pressure of lining the paper up juuuust right. Each piece felt like the “last difficult piece”. But I promise, you can do it. And it was worth it!
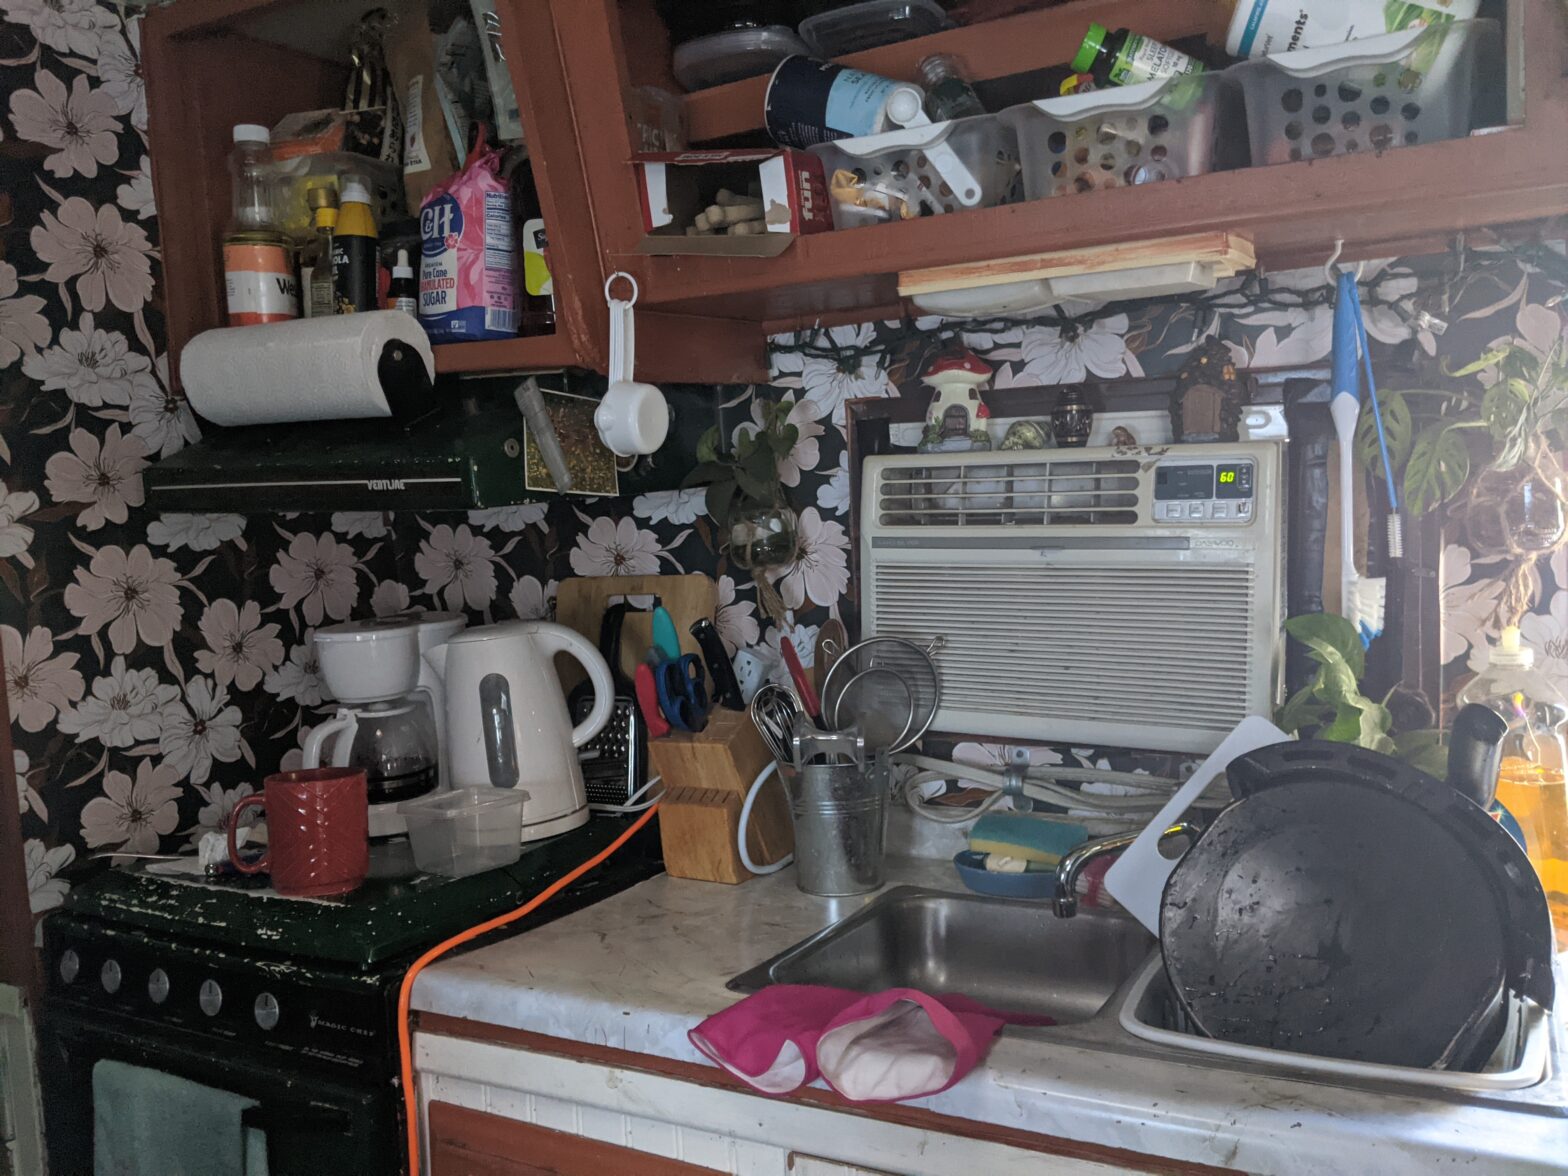
I ended up being able to transform my kitchen for under $25 and an afternoon. It’s been almost a week since I’ve done the paper, and I can honestly say I love using my kitchen so much more now!
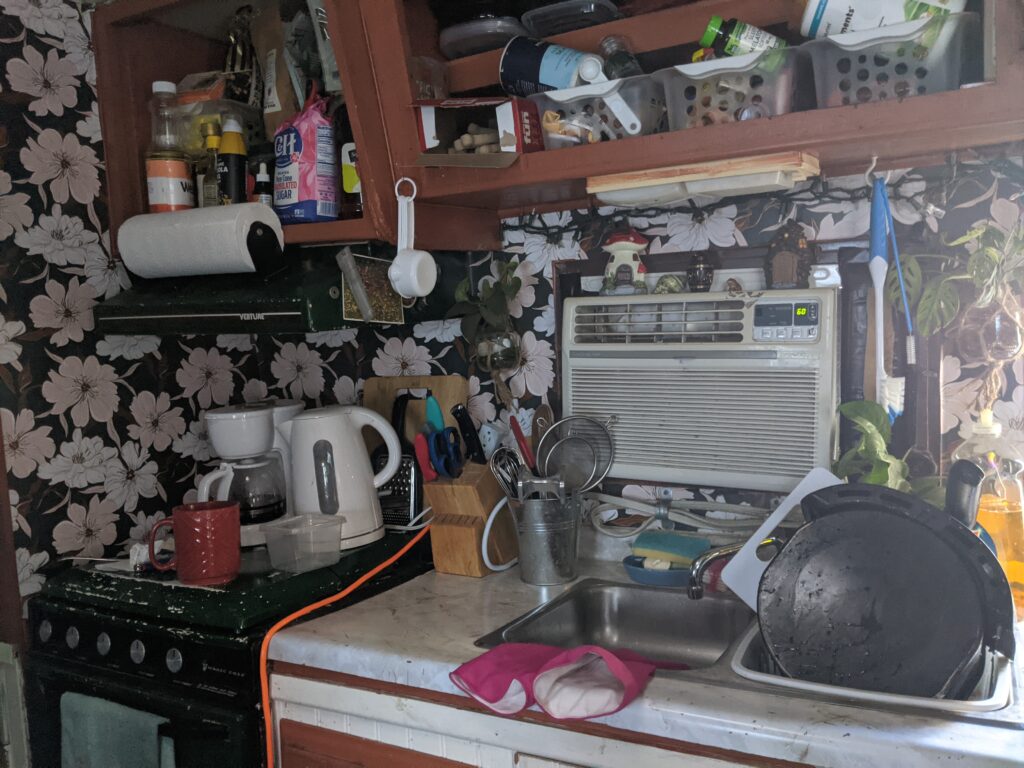
The kitchen feels like its own little home-y area now, and not just the wall where the stove and sink are. And it motivates me to keep the kitchen clean and looking nice. It feels especially wrong now to have dishes and trash piling up on the counter blocking my view of my lovely wallpaper.
I’m taking more joy in cleaning my space because I love the feeling of having a clean and beautiful kitchen. I was actually excited to come home from work today and clean my kitchen. I even bought a seasonal Fall candle and a little candle dish to match my aspiring aesthetic. I couldn’t wait to come home, clean my kitchen, and light my little candle. Who am I?
My cabinets are still ugly (but functional!), and are on the list of future projects. But even in spite of my ugly cabinets, I’m loving my kitchen!
I completely recommend doing this if you’re looking for a cheap and relatively quick way to brighten up your space! This was my first foray into wallpaper, and I think I’m a wallpaper girlie for life now. It was totally worth the frustration and hopeless feeling moments during the process. 😊
I will keep y’all updated on the wallpaper as it stays up on the wall. We’ll see how it ages and stands the test of time.
Thank you so much to whoever reads my first ever post! I really appreciate you taking the time to read this, and I hope to see you again next time!
With Love,
Yhanna
